I watch a lot of YouTube videos to keep my beauty regimen fresh, and nothing makes me feel fresher than a set of plush, perfectly shaped eyebrows to frame my face. Honestly, I don't wear makeup most days. If I'm heading out and have less than five minutes to get ready, shaping my brows (or getting them on fleek) is top priority.
I could spend nearly a whole paycheck in Sephora, Ulta, or the beauty section at Target, but since I haven't gotten one of those (a paycheck, that is) in about six months now, I'm gonna have to beat this face on a budget.
There are probably a million and one tutorials on shaping and filling your eyebrows, so I'll spare you the nitty gritty.
I usually gently outline my brows, using small strokes, with a dark brown eyebrow pencil. I then fill in the sparse areas with a NYX dark brown eyeshadow and an angled makeup brush.
I've watched some of my favorite YT beauty gurus use a brow pomade to shape and fill in their brows. A popular product is Dipbrow pomade by Anastasia Beverly Hills.
However.
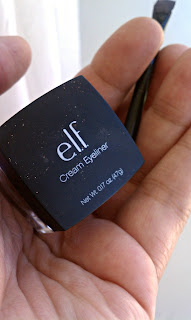
Ain't nobody finna drop about a half a tank of gas' worth on {just} my eyebrows, no matter how long the product lasts. After watching a couple of "dupe" videos, I decided to pick up a brown cream eyeliner by E.L.F. at Target for a few bucks.
I simply followed the natural curve of my brow using the angled brush, and gently filled in the sparse areas to create a nice, smooth shape. To keep everything looking natural, I set the cream liner with my trusty dark brown eyeshadow.
To clean up any tiny straggling hairs, I use a bit of concealeR just beneath each brow, set with face powder, and blend.
In the before pic, I finished one brow.
These brows lasted me much longer than if I had just used a pencil, and if I use a primer underneath, they are less likely to melt right off my face. TADA.
Want more tips on beauty on a budget? Let me know!


No comments:
Post a Comment